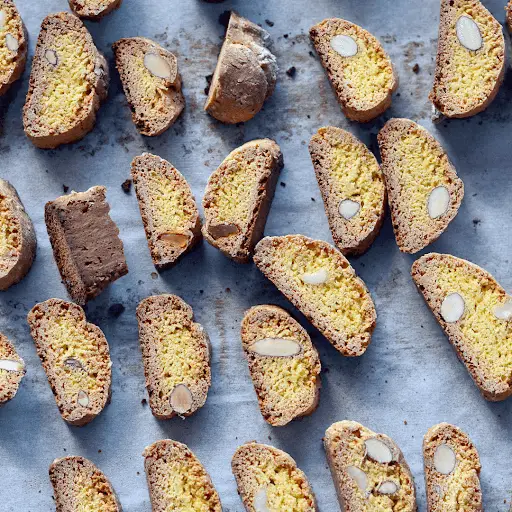
There’s something so special about biscotti. Theoir crisp, crunchy texture and unique oblong shape make them the best treat with a warm drink, whether it’s coffee or hot chocolate.
These twice-baked Italian cookies, also known as cantucci, are a staple in coffee shops and in my own kitchen.
Whether you’re a seasoned baker (like me!) or just starting out, making homemade biscotti is so rewarding.
But what happens when you’ve got a big batch of biscotti dough, and you know you won’t eat them all right away?
That’s where freezing comes in! Good news: you absolutely can freeze biscotti dough.
In this post, I’ll share the best way I’ve found to freeze biscotti dough, ensuring your cookies maintain that perfect crunchy texture and delicious flavor.
Why I Freeze Biscotti Dough
There are a few good reasons why I freeze biscotti dough. Maybe I’m baking for a crowd and want to get a head start. Perhaps I’m experimenting with different variations and want to save some dough for later.
Or maybe, like most people, I just love having homemade biscotti on hand for that perfect cookie craving.
Freezing biscotti dough is my go-to method for enjoying fresh-baked cookies whenever I want, without having to make a whole batch of biscotti every single time.
Making the Biscotti Dough: My First Step
Before we get to freezing, let’s talk about the biscotti recipe itself.
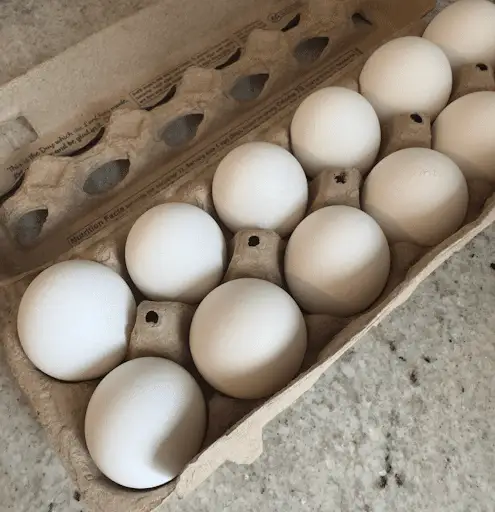
My go-to traditional Italian biscotti recipes usually involve simple ingredients like all-purpose flour, sugar (often a mix of granulated and brown sugar), eggs, almond extract (or vanilla extract – sometimes I even use orange zest!), and sometimes nuts like almonds or other additions like chocolate chips or cocoa powder.
There are endless possibilities when it comes to flavor variations! From classic almond biscotti to chocolate biscotti, chocolate chip cookies masquerading as biscotti, or even chocolate crinkles turned into biscotti, the options are endless.
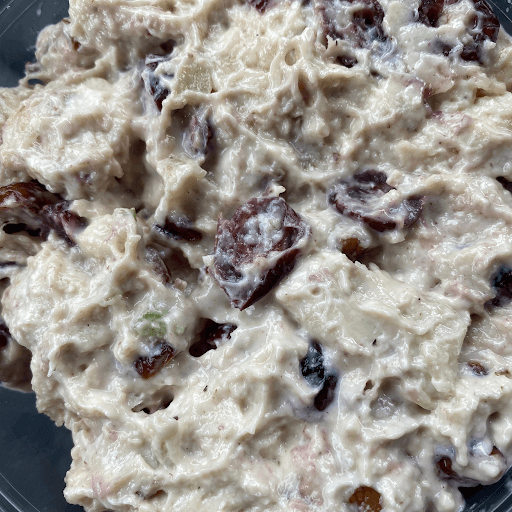
The first step I take in any biscotti recipe is combining the dry ingredients (flour, sugar, baking powder, etc.) in a medium bowl.
Then, I mix in the wet ingredients (eggs, extracts) to form a sticky dough. This sticky dough is totally normal for biscotti – it’s part of what gives them their unique crunchy texture.

Freezing Biscotti Dough: My Best Methods
Now we can talk about freezing the dough. Here are the best methods I’ve discovered for freezing biscotti dough:
- Form the Biscotti Logs: After mixing the dough, I divide it into the number of biscotti logs my recipe calls for. I usually do this on a lightly floured surface. I shape the dough into short logs or longer logs, depending on how I want my biscotti to look.
- Wrap Tightly: I wrap each biscotti log tightly in plastic wrap. This is crucial! I try to remove as much air as possible to prevent freezer burn and maintain the best quality.
- Seal and Freeze: I then place the wrapped logs in resealable freezer bags or a freezer-safe bag. Again, I squeeze out as much air as possible before sealing. I always label the bag with the item’s name (biscotti dough) and the date so I know how long it’s been in there.
- Flash Freeze (Optional but Recommended): For even better results, I recommend flash freezing the logs before placing them in the freezer bag. I do this by placing the wrapped logs on a parchment-lined baking sheet and freezing them for about an hour, or until they are firm. This helps prevent them from sticking together and makes it easier to bake individual biscotti later on.
Baking Frozen Biscotti Dough
When I’m ready to bake my frozen biscotti dough, here’s my process:
- Thaw Overnight: The best way I’ve found to thaw biscotti dough is to transfer the frozen logs to the refrigerator overnight. This slow thaw helps maintain the dough’s texture.
- First Bake: Once thawed, I place the logs on a parchment paper-lined baking sheet. I bake them according to my recipe’s instructions for the first bake.
This first bake is what gives biscotti their characteristic dry, crunchy texture. They won’t be completely baked through at this point.
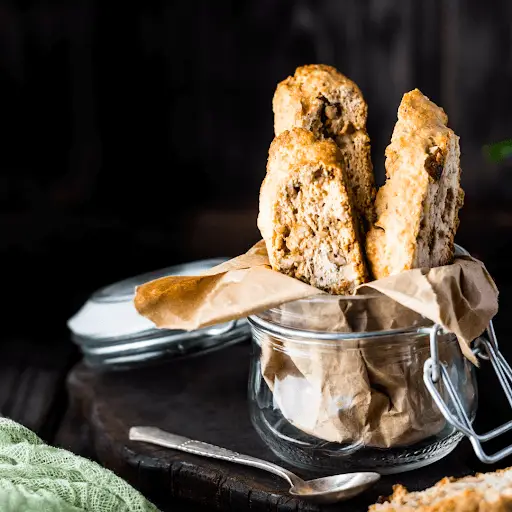
- Slice and Second Bake: After the first bake, I let the biscotti logs cool slightly. Then, using a sharp, serrated knife, I slice the logs into inch slices (or my preferred thickness).
I lay the individual biscotti slices cut sides down on the same parchment-lined baking sheet. I bake them a second time until they are golden brown and crisp. This second baking is what makes them twice-baked Italian cookies.
- Cool and Enjoy: I let the biscotti cool completely on a wire rack before storing them. This ensures they reach their maximum crunchiness.
Storing Baked Biscotti So They Stay Crunchy
Once my biscotti are baked and cooled, proper storage is key to maintaining their long shelf life. I store biscotti in an airtight container in a dry place, away from direct sunlight.
I’ve even tried adding desiccant packets to the container to absorb any residual moisture and help keep them crunchy for longer. And hey, it works!

Biscotti Baking: My Tips and Tricks
Over the years, I’ve encountered my fair share of baking mishaps. Here are a few common issues and how I fix them:
Biscotti is too hard: This can happen if they’re baked for too long during the second bake. Keep a close eye on them during the second baking and remove them when they’re golden brown and crisp, but not overly hard. Also, ensure your oven temperature is accurate.
Biscotti too soft: This usually means they haven’t been baked long enough during either the first or second bake. Return them to the oven for a few more minutes during the second bake, if needed. Make sure they are completely cooled on a wire rack to allow them to fully dry and crisp up.
Biscotti logs are spreading too much: If your biscotti logs spread too much during the first bake, it could be because the dough is too warm. Try chilling the dough in the refrigerator for about 30 minutes before shaping the logs.
Biscotti breaking when slicing: This is a common problem! Make sure you’re using a sharp, serrated knife and that the biscotti logs have cooled slightly but are not completely cold when you slice them. A slight warmth makes them easier to cut without crumbling.

Biscotti Variations: Endless Possibilities
One of the things I love most about biscotti is all the variations you can make. Here are a few of my favorites:
- Chocolate-Dipped Biscotti: After the second bake and cooling, dip half of each biscotti in melted chocolate and let it set on parchment paper.
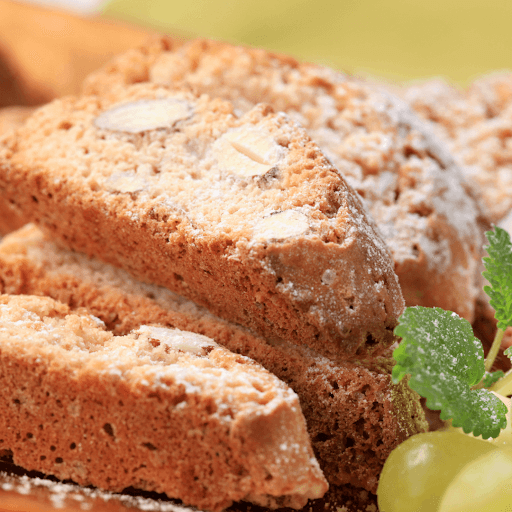
- Nutty Biscotti: Add your favorite nuts, like almonds, pistachios, or hazelnuts, to the dough.
- Citrus Biscotti: Incorporate orange zest, lemon zest, or even a bit of orange or lemon extract for a bright, citrusy flavor.
- Spice Biscotti: Add spices like cinnamon, cardamom, or nutmeg to the dough for a warm, comforting flavor.
FAQs: Your Biscotti Freezing Questions Answered
Q: Where did biscotti originate?
A: Biscotti originated in Italy, specifically in the town of Prato. They are a traditional Italian cookie that has been enjoyed for centuries.
Q: My biscotti dough is very sticky. Is that normal?
A: Yes, my biscotti dough is usually quite sticky. I don’t worry about it too much. Lightly flouring my work surface is usually enough.
Q: Can I freeze biscotti dough that has chocolate chips or other mix-ins?
A: Absolutely! I freeze biscotti dough with chocolate chips, nuts, dried fruit, or any other mix-ins I like all the time.
Q: What’s the best way to enjoy biscotti?
A: I love dunking them in coffee, hot chocolate, or even sweet dessert wine.
Q: How do I know when my biscotti are done?
A: They should be golden brown and feel firm to the touch. They will continue to crisp up as they cool.
So, there you have it! Freezing biscotti dough is a simple process that allows me to enjoy freshly baked biscotti whenever the craving hits.
With a little planning and the proper procedure, I can have a long shelf life of these twice-baked Italian cookies on hand.
Now, if you’ll excuse me, I’m off to make a batch of biscotti… maybe chocolate-dipped biscotti this time!