
Making pizza at home is really fun. It’s a great activity to do with your kids and there’s really nothing better than homemade pizza dough.
In the last months, Chuck has been sharing some of our best pizza recipes on this blog. Today, I want to show you how to make them perfect with my special 72 hour pizza dough recipe, that I learned from the best pizza maker in Rome.
You can use it to make a nice pizza bianca, like I’ll show you below, or to make dough for any kind of pizza you’ll ever want to make from now on.
One recipe that fits all. Let’s start!
What is Roman pizza?
Have you ever had authentic Roman pizza? Authentic pizza straight from Rome?
It’s a different type of pizza dough. Most people are familiar with Sicilian and Neapolitan pizza recipes. Roman pizza, on the other hand, is not widely known here in the United States.
This 72 hour pizza dough is all about a long fermentation time that’s going to make the difference between good pizza, and great pizza.
It’s a cold-fermented dough. It’s going to create such a beautiful crispy crust that it will definitely become one of your favorite pizza dough recipes.
And it’s such a simple recipe! With minimal effort and some simple ingredients from the supermarket or grocery store, you can impress your friends and family with your own dough.
View this post on Instagram
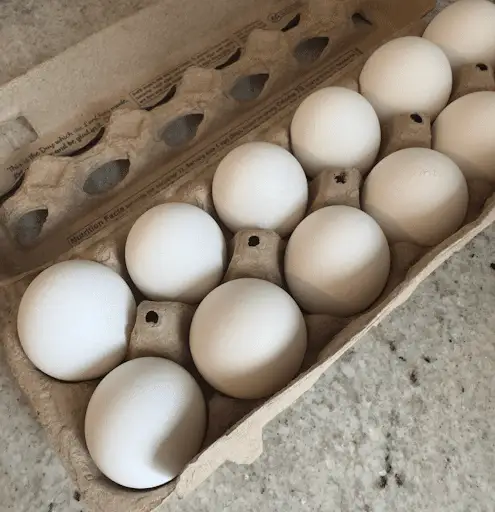
The first time I saw the Roman pizza Bianca, I was mesmerized with it. It’s light and airy in the middle, but sturdy on the bottom to support all of your favorite toppings.
I love Sicilian pizza, don’t get me wrong; but it’s heavy, and lacks the airiness in the middle.
Right away I knew I had to learn how to make it and bring it back home. But first, I needed someone who knew what they were doing to teach me their ways.
So, I started searching on the internet. I kept reading about the best pizza maker in Rome, Gabriele Bonci. People call him the “Michelangelo of pizza.”
The Michelangelo of pizza
If I wanted to learn from the best, I had to get in touch with this guy.
So I started reaching out to him and every blogger I could find that wrote about him. Maybe someone could get me a class with him.
I kept getting turned down. I was always getting answers like, “He’s too busy,” “He’s not giving classes right now,” “He’s opening a new restaurant and doesn’t have time.”
But I kept at it, knowing we would be going to Italy soon to visit my father, who lives there for part of the year. I knew if we could land a pizza making class with “The Michelangelo of pizza” himself, it would make the whole trip worth it.
After months of pestering and stalking this guy down, he finally agreed to meet with me, and I took a cooking class with the top Roman pizza man in Rome.

What did I learn?
Two really important things: high hydration and long, cold fermentation. When I say long, I mean 72 hours.
It’s what gets you super light and airy texture and lots of flavor.
We’re going to be going over all of that in our 72 hour pizza dough recipe today. I’m going to be showing you the ins and outs of making the perfect Roman pizza Bianca. Here’s what I’ll cover:
-
The ingredients
-
How to make the dough
-
How to handle the dough
-
How to bake the dough
*(I also made a YouTube video about this, in case you don’t feel like reading)*
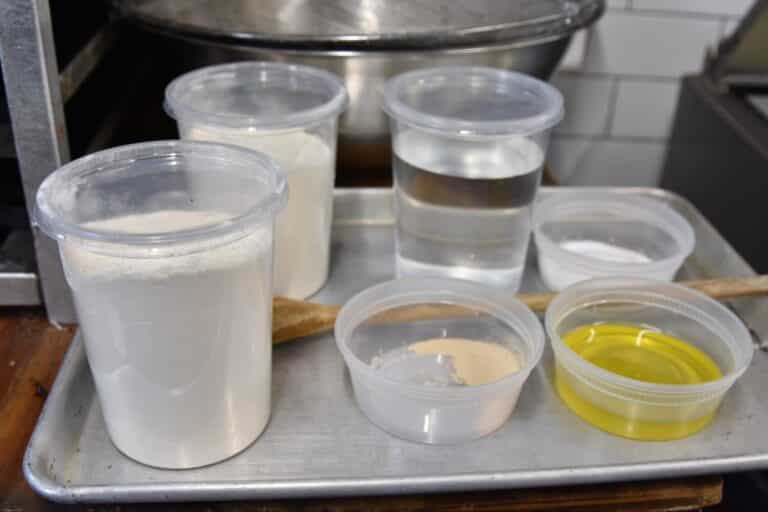
Here Are The Main Ingredients For This 72 Hour Pizza Dough
My 72 hour pizza dough recipe doesn’t have many ingredients. But make sure to pick quality ones, and to respect the ratio that you’ll read in the recipe card below!
Here’s what you need.
Flour: For Roman pizza, a high-protein flour makes the best pizza dough. It’s usually easy to find at the grocery store. Most bread flour is higher in protein than all-purpose flour.
Water: This is probably one of the most important aspects of Roman pizza dough. Higher hydration is what we want. We use a 75% hydration, flour to water ratio. In other words, if you’re using 10 pounds of flour, you’ll use 7.5 pounds of water. 5 pounds of flour, 3.75 pounds of water. Basic math.
Yeast: Instant yeast works fine in this recipe. If you prefer fresh yeast or active dry yeast that’s fine too.
Salt: Get a high-quality Kosher Salt or a fine sea salt.
Extra virgin olive oil: Invest in a high quality extra virgin olive oil. This is going to add some great flavor to your Roman pizza Bianca.
How to Make Roman Pizza Bianca with a 72 Hour Dough Recipe (It’s easier than you think!)
Any Roman pizza recipe starts with making a good dough. So let’s mix our dry ingredients.
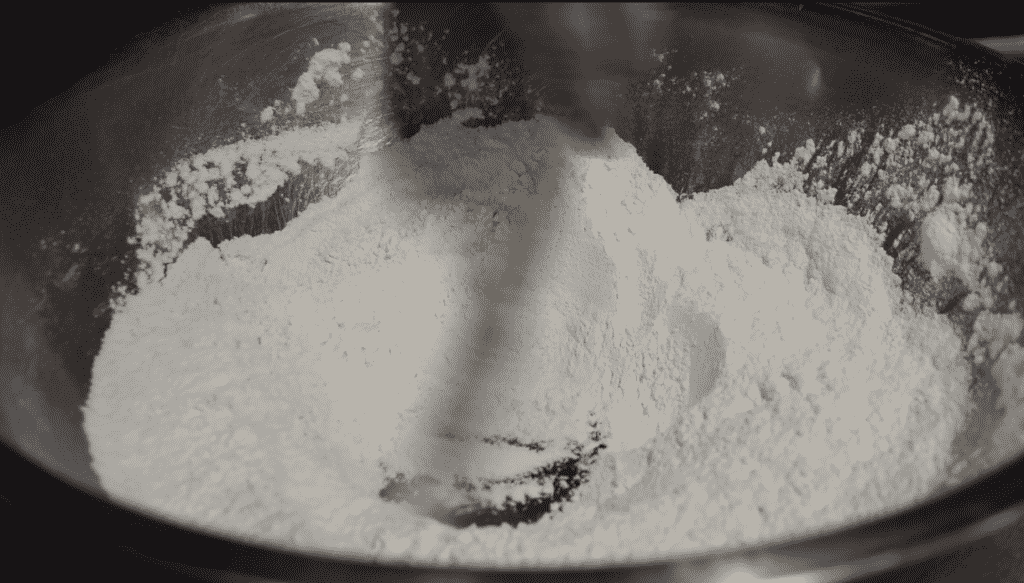
Step 1: Combine flour and yeast in a large bowl. Mix them well with a wooden spoon, then create a neat circular mound at the bottom of the bowl.
Step 2: Once you have your water measured out, add it right to the bowl. For best results, use cool water.
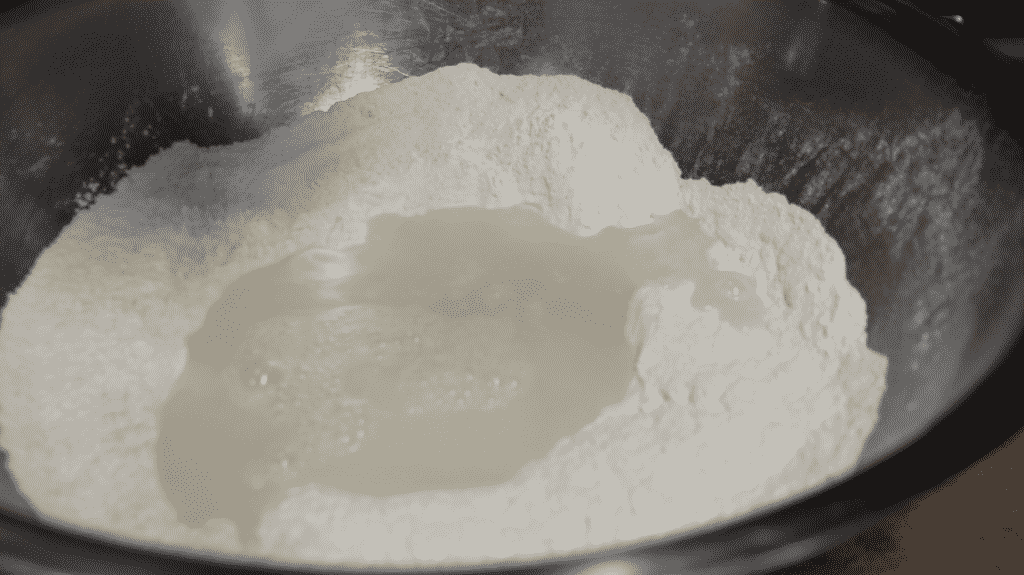
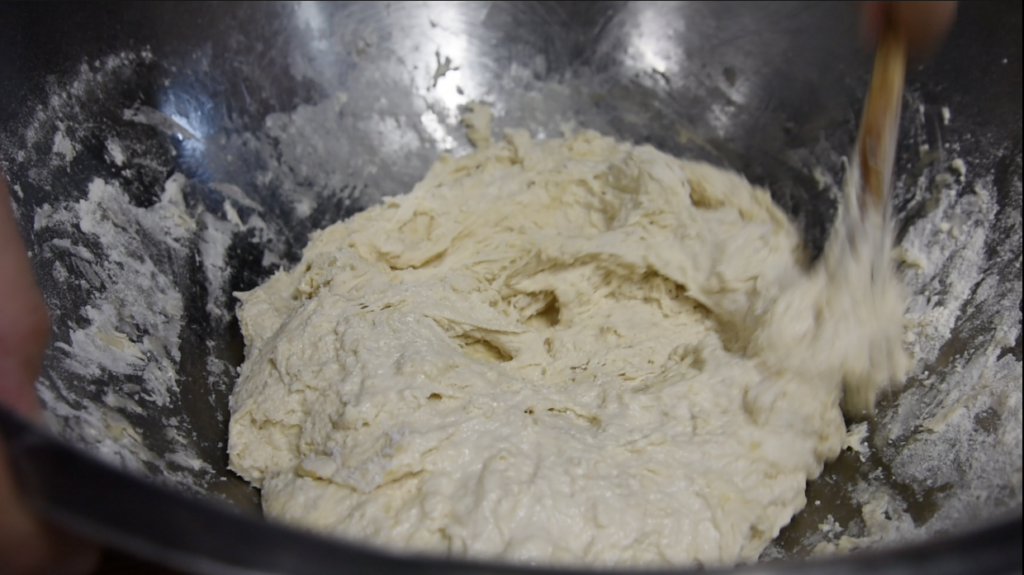
Step 3: Start mixing it all together for a couple of minutes. Keep using the wooden spoon. At first, it’s going to look like a big mess, but don’t worry. It’ll start to come together.
When a rough dough ball forms, start folding in your olive oil.
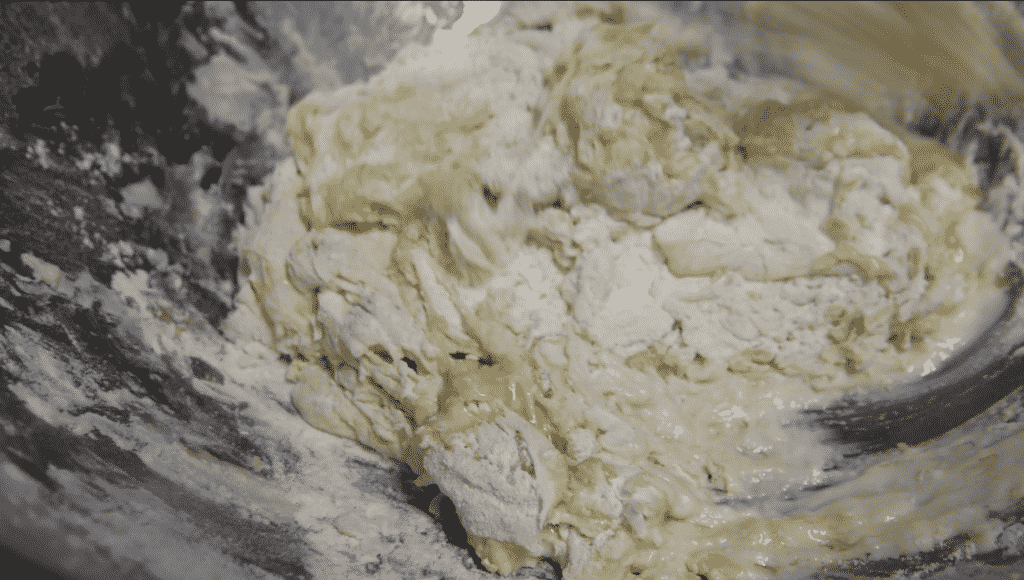
Step 4: Once the olive oil is mixed throughout, add your salt.
Usually, the salt tends to get after the yeast and slow it down. So, I like to add my salt at the very end. It gives the yeast a chance to start working. Fold the salt in, and keep mixing just as you have been doing until now.
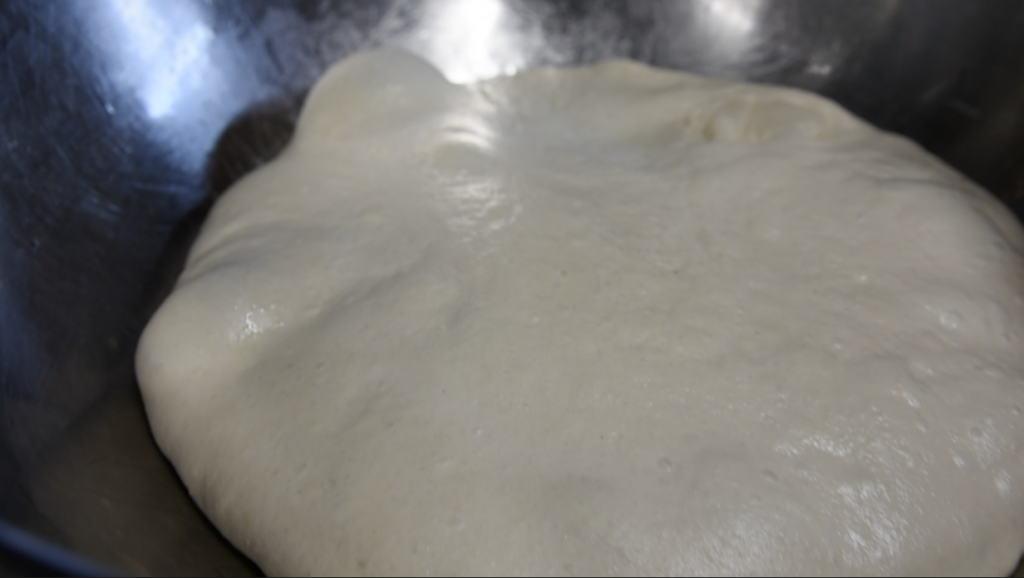
Step 5: Cover the bowl with plastic wrap and put it into the fridge for 48 hours.
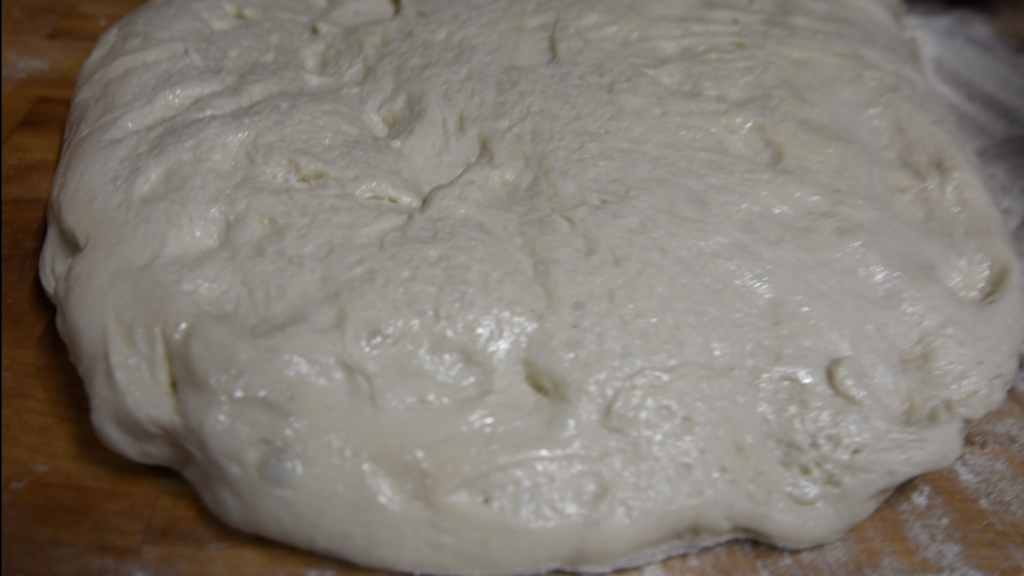
Step 6: For the next couple of days, we’re going to leave the dough in the fridge. This is the bulk fermentation stage. The yeast will do its magic and the dough will start to bubble up. During those 48 hours in the fridge, the yeast will do its magic and the dough will start to bubble up. It’s the part of the slow ferment process when the dough develops its amazing flavors. At the end, it will look something like this:
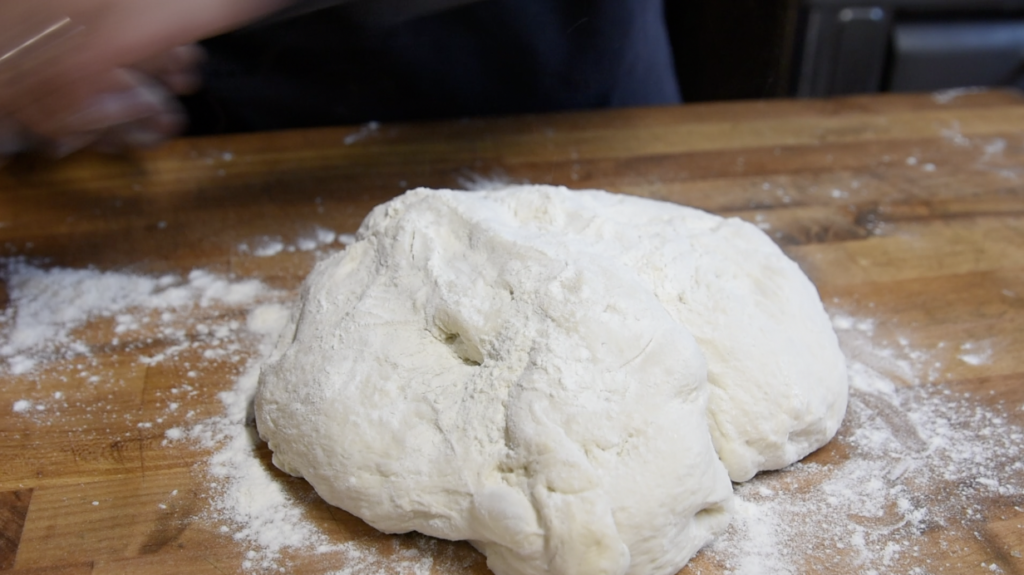
Step 7: After 48 hours in the fridge, it’s time to cut your dough into equal portions to fit your pizza pans.
First, you need a floured surface. You can use your kitchen counter or a large cutting board.
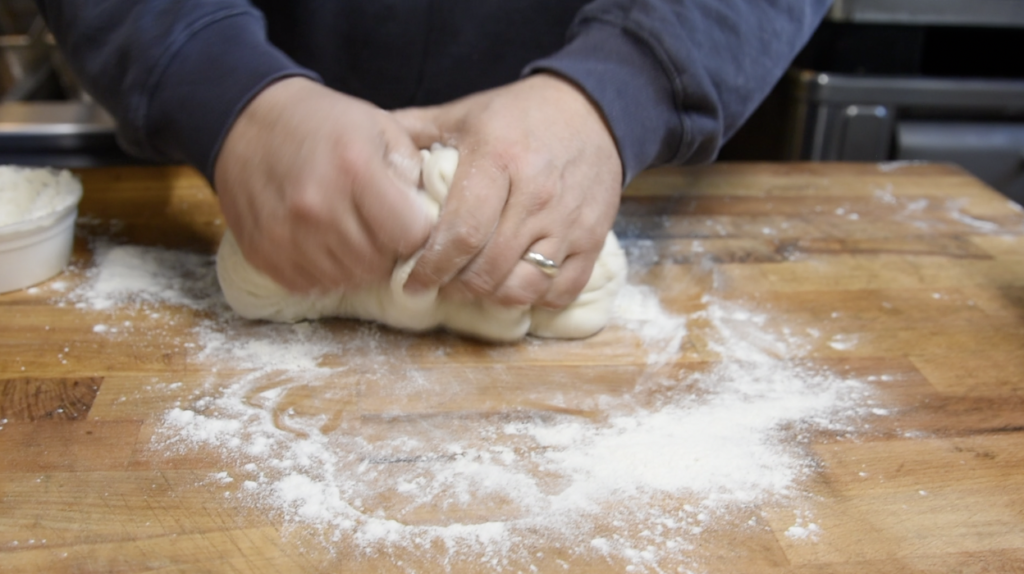
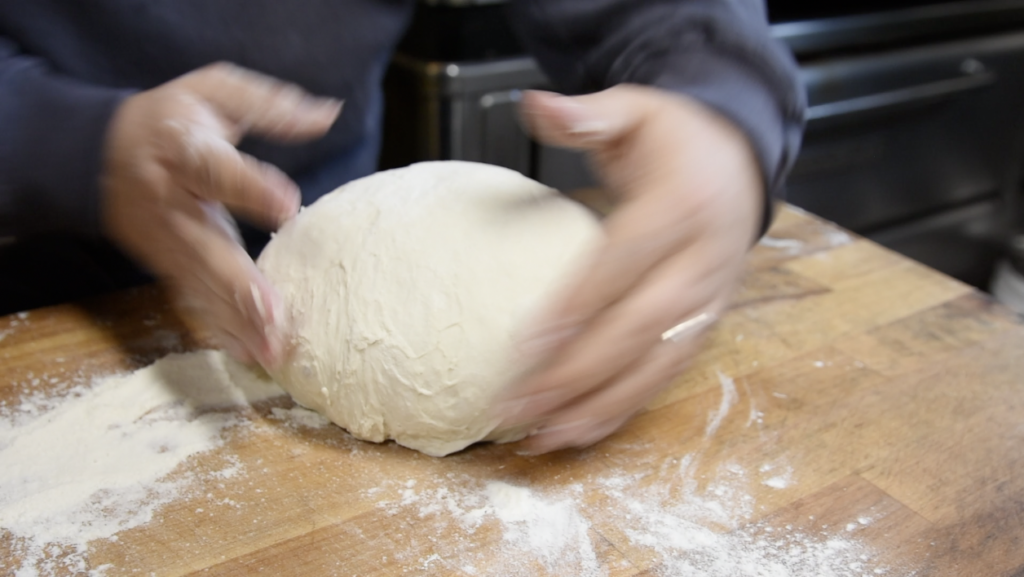
Step 8: You’re then going to knead the dough by grabbing it and folding it in half, squeezing and pinching the edges as they come together. The process will look like this:
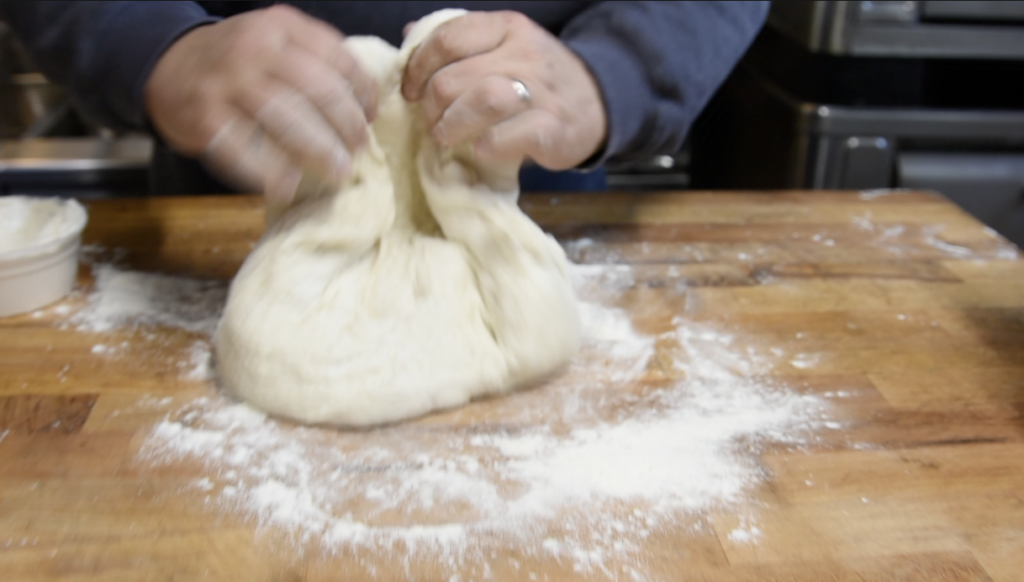
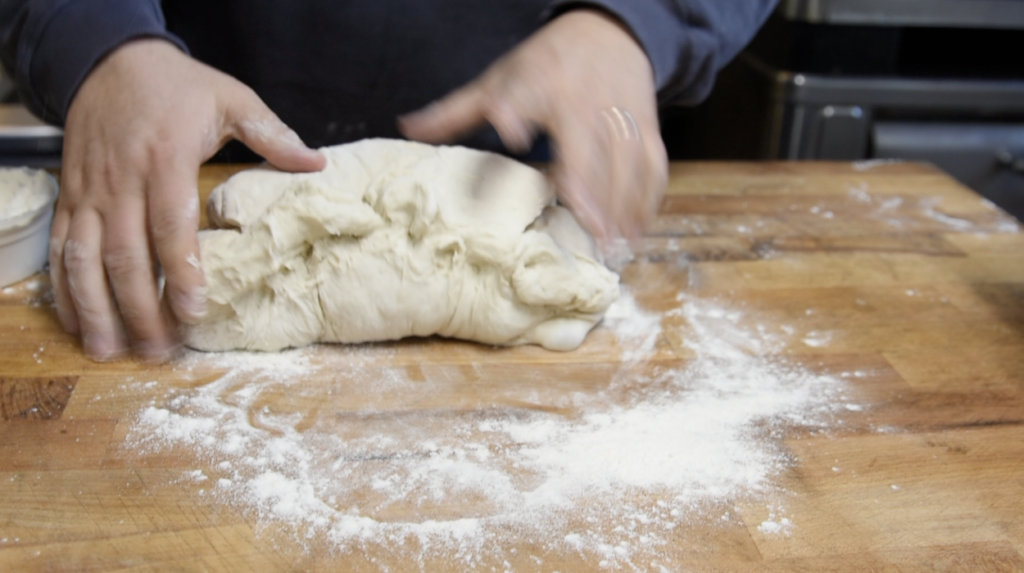
Step 9: You want to keep the air inside of the dough ball as much as you can.
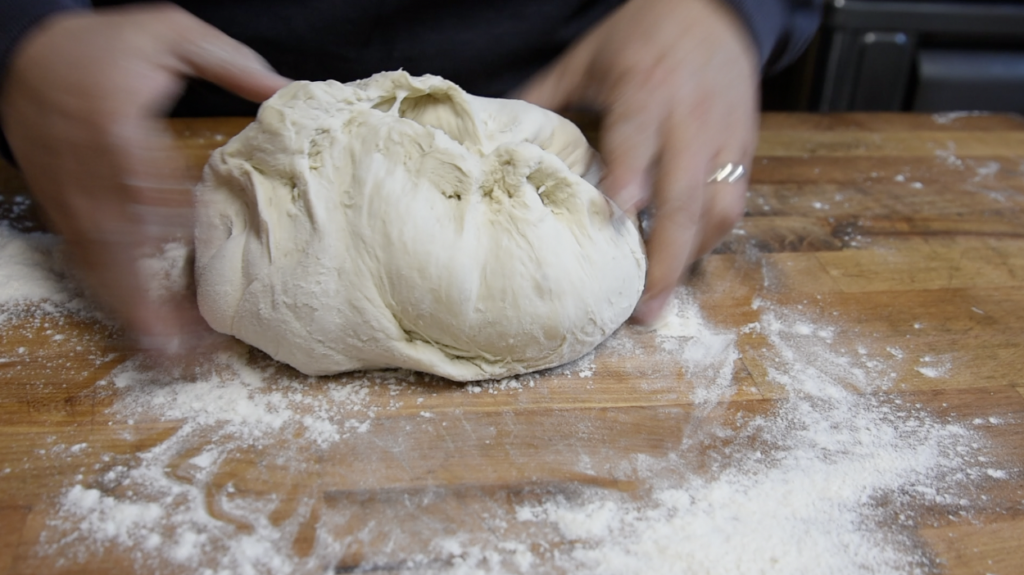
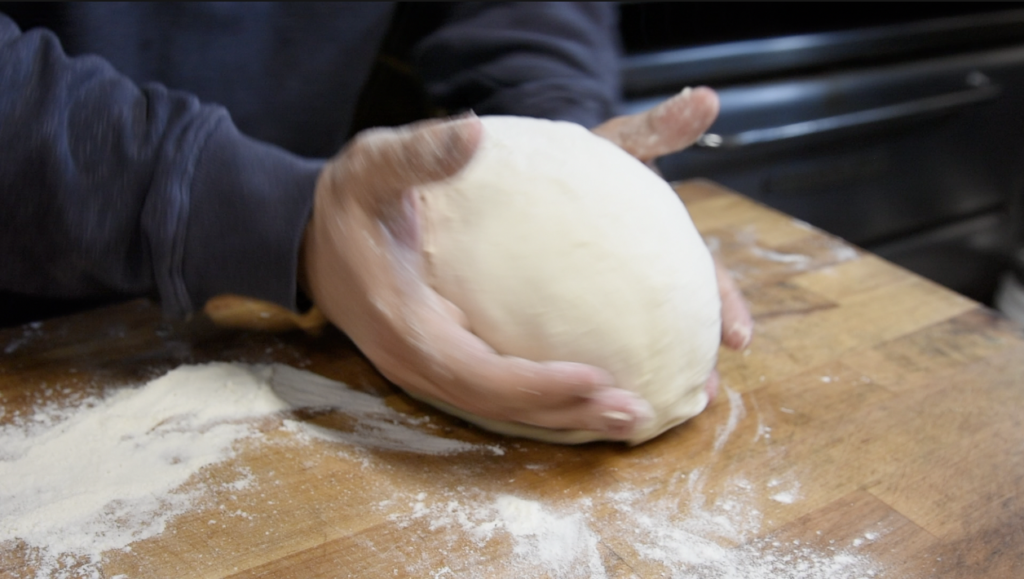
Step 10: Half and fold about ten times, or until the dough gets a nice circular shape. Place it with the smooth side up onto the floured surface and rotate it until it forms a tight ball. The edges of the dough should be underneath.
Step 11: Now, place your dough ball in a bowl or a plastic container and cover with a damp kitchen towel or plastic wrap. Then, put it back in the fridge for another day (I know, I know, it’s so long, but this is the price you pay for a delicious Roman pizza!)
After another day, your dough has been fermenting for 72 hours!
When you’re ready to make your Roman pizza bianca, remove your dough balls from the fridge and let them stand at room temperature for a couple hours. This will let your dough rise and relax. It will be easier to handle.
After another day, your dough has been fermenting for 72 hours!
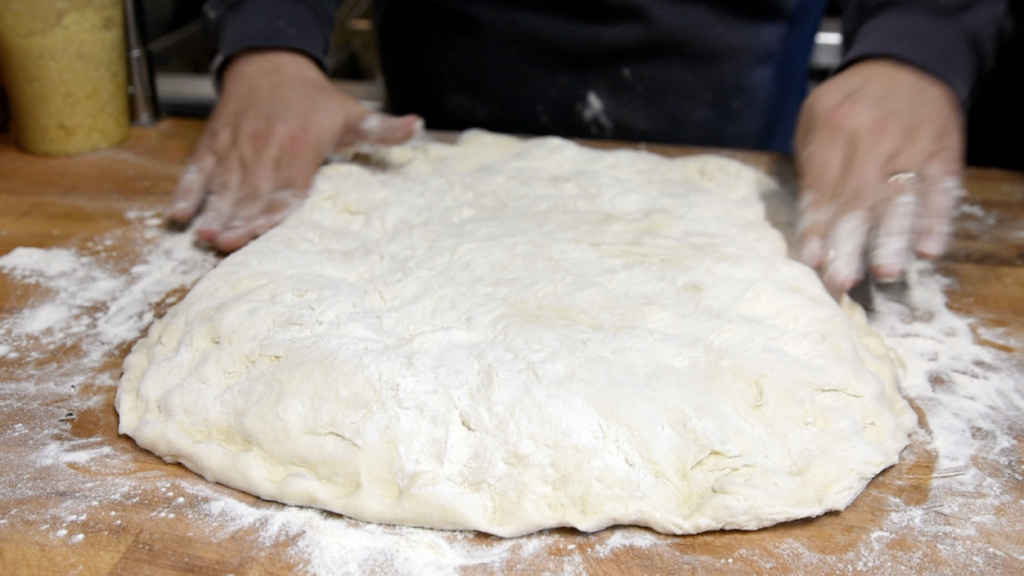
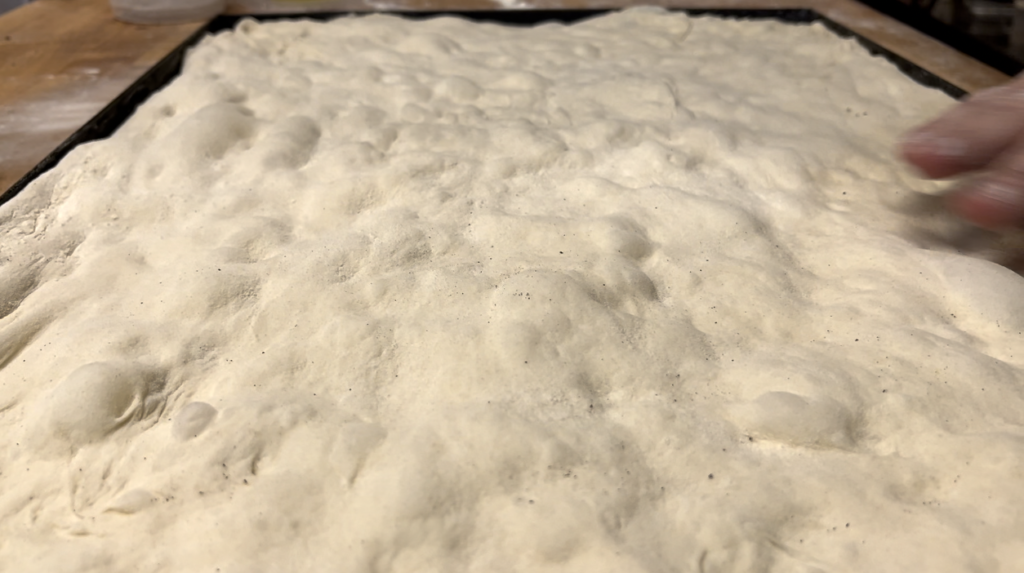
When it comes to room temperature, place the dough ball back onto the floured surface. If the process was done correctly, your dough will look like this:
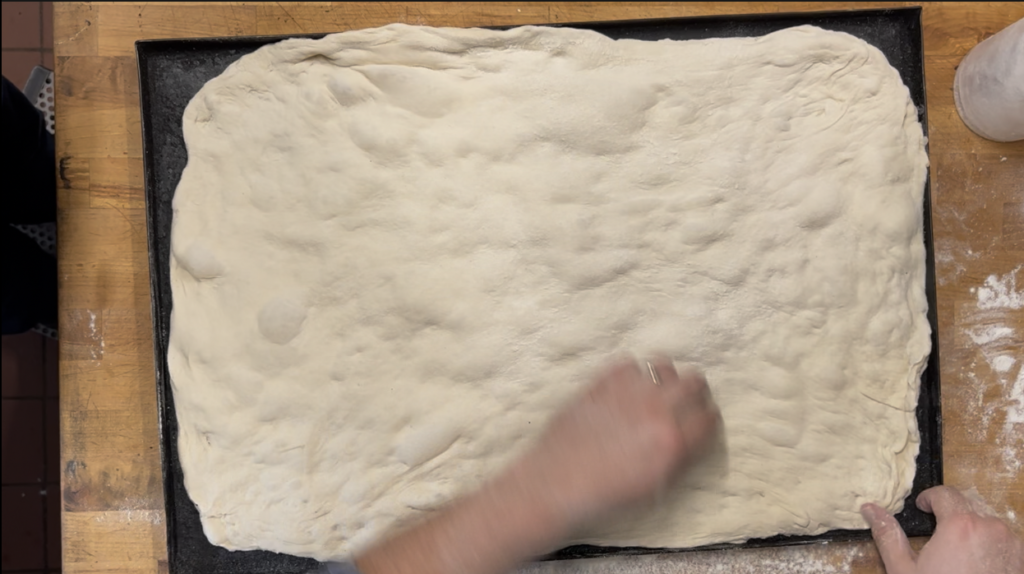
Step 12: Cover the dough ball with flour so you can handle it without too much stickiness, and spread it around to get it to resemble the shape of a sheet pan.
We make this type of pizza in a pan. No need for a pizza peel, baking steel, or professional pizza oven. A slightly oiled sheet pan and a home oven will work just fine. However, if you can find a pan made of blue steel, your pizza will come out better – as this type of pan works great with high heat.
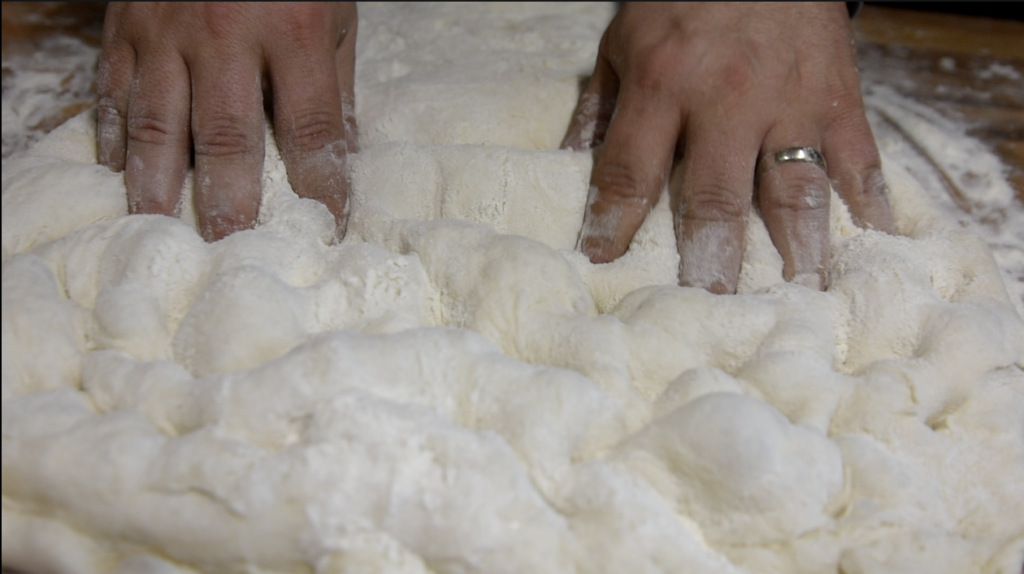
Once the dough is shaped to your liking, use your fingers to crimp the edges down, trapping all of the air inside.
Step 13: Now, keep using your fingers to create little air pockets all over the dough. The more the merrier. This helps create that nice airy “crumb” that we’re looking for.
Step 14: Now carefully transfer the partially spread out dough from the work surface to the oiled pan. If you watch the video you’ll learn a little trick on how to do that. Stretch the dough to the edges of the pan.
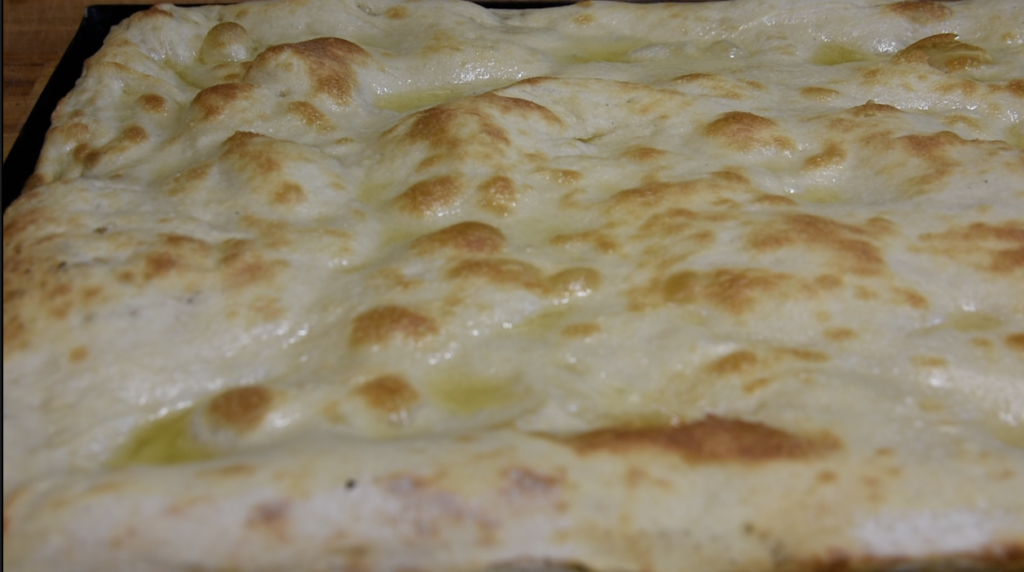
Step 15: Drizzle the surface with olive oil, and put the pan in the oven at 400° F for 12-15 minutes. About halfway through, take a knife and poke all of the air bubbles, to keep the surface of the dough nice and even.
If you’re going to load it with sauces and toppings, it’s important to note that the pizza is going to go back in the oven for another ten minutes. The dough will become much more crispy after its second round in the oven.
Congratulations! You’re now a Roman pizza Bianca master!
72 Hour Pizza Dough Recipe FAQ’s
Q: Do I have to wait the entire 72 hour fermentation process?
A: If you’re pressed for time, you don’t have to wait the entire 72 hours. Your Roman Pizza Bianca will still be very good, but you won’t develop as much flavor and the dough probably won’t be as light and airy as it would be with the full 72 hours. Using lukewarm water and not putting the dough in the fridge will speed up the process, but the results won’t be as good.
Q: Do I have to let the dough ferment in the fridge?
A: You don’t have to let it ferment in the fridge, but a long and cold fermentation is what allows the yeast to work and create so much flavor.
Q: Do I have to use so much water? A wet dough is really hard to work with.
A: You can use less water if you choose, but you won’t get the airy and light crumb that we are striving for.
Q: Can I freeze the 72 hour pizza dough if I don’t use it right away?
A: Totally! After the 72-hour rest, portion it out, wrap it tightly, and freeze it. When you’re ready to use it, thaw in the fridge overnight and let it come to room temp before stretching..
Q: Why does a 72 hour pizza dough recipe make such a big difference in flavor?
A: The long fermentation allows the yeast to work slowly, breaking down starches into sugars and developing natural umami. That’s why it tastes richer, has better structure, and crisps beautifully in the oven.
What to Do With It
This 72 hour pizza dough recipe will get you a nice pizza bianca, but you can also use it as a base for any other type of pizza. For instance, if you like white pizzas, you can add any topping of your choice and enjoy.
But you could also:
- Turn it into a Pizza Rossa: Use your favorite marinara sauce, or make a quick tomato sauce with crushed tomatoes and olive oil, and pop it back in the oven for a few minutes.
- Make some Pizza e Mortazza: Cut the pizza bianca into small pieces, open them up and fill them with mortadella.
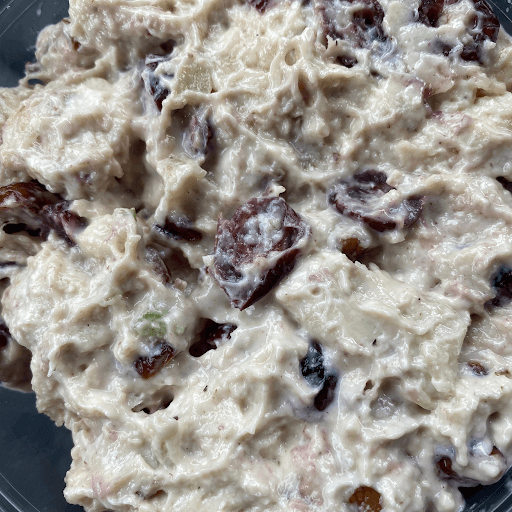
- Make a Stuffed Roman Pizza: If you really want to impress your friends, slice the pizza dough in half, as if it were a sandwich. Fill it with your favorite sandwich stuffing, and top it with your favorite pizza. We stuffed an entire pepperoni pizza with chicken parm, and everyone loved it!
We even use it to make our beloved Meatball Parm!
There are infinite uses for it. I hope you enjoy making it at home. And if 72 hours are too much, we have a smoking hot slice waiting for you here at Mortadella Head!
Ready to Try the 72 Hour Pizza Dough Yourself?
There you have it—the secret to unforgettable Roman-style pizza lies in a little patience and a lot of flavor. This 72 hour pizza dough recipe might take some planning, but the payoff is a light, crisp, and airy crust that tastes like it came straight from a pizzeria in Rome.
Give it a go, and let us know how your pizza turns out in the comments—we’d love to hear what toppings you chose or if you made any fun tweaks!
And hey, if you’d rather skip the prep and just dive into something delicious, check out the Mortadella Head store here: https://mortadellaheadstore.com/ 🍕


Easy Roman Pizza Recipe – 72 hour dough recipe
- Total Time: 3 days
- Yield: 2 large pizzas (18"x 26") 1x
Description
Learn how to become a Roman pizza master! We’re going to show you the ins and outs of making Roman pizza as taught to us by the Michelangelo of pizza.
Ingredients
- 5 lbs high protein flour
- 3.75 lbs of water
- 2.4 dry ounces of salt
- 3 grams of yeast
- 3.2 ounces of olive oil
Instructions
- Dump your flour and dry yeast into a bowl, and thoroughly mix, making a hole in the center.
- Add your water, a little at a time, mixing more to incorporate with the flour and yeast.
- Once incorporated, fold in olive oil to the mixture, and keep mixing.
- Once everything is blended together, add your salt at the very end, and mix to combine.
- Cover the dough, and refrigerate for 48 hours.
- After 48 hours, start kneading the dough. Flour your work surface to avoid sticking. Take each end of the dough, and fold the ball in half, pinching the two edges together once they’re joined to seal in the air. Do this about 10-15 times, or until a dough ball begins to form.
- Take your dough ball and cut it into two or more equal parts according to your needs. With 5 lbs of flour, you can make two balls that’ll fit into an 18″x26″ baking sheet (each).
- Put the dough balls on the table with the edges at the bottom, one at a time. Turn them with your hands, folding them underneath themselves.
- Put each dough ball back in the fridge for another 24 hours.
- Flip one of the balls out of the fridge, and begin spreading it out on the counter to form a shape similar to a pizza tray. Crimp the edges down, and use your fingers to create air pockets over the surface of the dough.
- Carefully transfer the dough into an oiled baking sheet. Use your hands to spread the dough to the edges.
- Drizzle with olive oil and cook in a 400° oven for 12-15 minutes, taking it out halfway to poke and deflate all of the rising dough bubbles.
- Top with your favorite pizza toppings, and cook one last time for about 10 minutes.
- Enjoy!
Notes
Ingredients are given in weight as opposed to volume to make this recipe as accurate as possible.
- Prep Time: 72 hours
- Cook Time: 10 minutes
- Category: Pizza
- Cuisine: Italian


45 Responses
Looks great! Is this recipe for two doughs? In the text it talks about two separate dough balls, but the recipe notes it produces a single?
Hi Garrett, and thanks for your feedback. This recipe is enough to make 2 large pizzas, each in a sheet pan that is 18″ x 26″. You should make a single ball first, and then cut it into two or more equal parts after the first 48-hour rising. I’ve edited the recipe card for clarity, let me know if you have any more doubts 🙂
Thanks!
Thank you for reading!
What percentage of salt, yeast and oil are you using for this recipe? I would like to scale it down. Thanks again
Made the dough and it truly is fantastic! I did halve the recipe as my blue steel is only 12×18. That said, I still had enough dough for two sheets.
That’s great! I’m glad you liked it 🙂
Is 3 grams of yeast correct here? Seems like so little and everything else is in ounces. I can barely measure 3 grams of yeast.
I agree. Is three grams actually correct? I divided the recipe by 5, but kept the yeast at 3 grams. It seemed to turn out much better than my previous attempt.
I used a 30x40cm blue steel pan and the dough fits that nicely.
How many and what size round pizzas will this make please?
Hi Kathleen. With this recipe, you can make 2 large 18″x26″ pizzas. If you prefer round pizza, you will get about 3 to 4 18-inch pizzas.
Hi, How do you make it so that the pizza doesn’t stick to the pan? You didn’t use any oil, so I didn’t either and the baked dough is completely stuck 🙁
It looks beautiful though!
Thank you!
Hi Mel, and thanks for your feedback. Our pans are seasoned from all they use they get daily, and don’t need anything to prevent the dough from sticking. However, for homemade production, it would be better to use a little oil. I’ll update the recipe for better clarity. Have fun making pizza at home! 🙂
Thank you! No worries, I just started oiling my pan, and pizza comes out fantastic! Crispy bottom. I put a little salt and pepper into the oil and its perfect. We actually sell slices at our pop up shop, and they are a hit. It is truly, a wonderful recipe. Thank you so much for sharing it!
Active dry, instant, or fresh yeast?
Hi Mel. They all work fine with this recipe.
Big problems here. I have made pizza for a long time, but even I didn’t not catch onto the issue here which is that the amount of dough is WAY too much for the amount of pizzas the author recommends. The author states that this recipe is for two 18×26 sheets of pizza. So following this logic, I halved the recipe since I only needed one pizza.. After 72 hours of cold proofing and ball shaping, I turned the dough out and placed it on my 18 x 26 sheet, and it felt heavy to me, but I wanted to follow the directions. In the oven it rose beyond even the height of even a large focaccia, but was dense and undercooked inside even after taking it out after 8 minutes, topping it and placing it back in to bake for another 8-10 minutes. So, to recap: this is the wrong amount of dough for this style of pizza (or any pizza). I’d say it’s twice the dough you need for the pan size given. this recipe is enough for at least 4- 18 x26 pizzas, not two. The dough itself is no different than any high hydration dough I’ve used, and the cold proofing methods are sound. One way to fix this problem is for the author to provide an ideal weight for each dough ball for a given sheet pan size. That way at least you’re in the ballpark. As it is it was inedible and wasted three days and many hours of my weekend. I should have known better, given that I make pizza a lot, but because this is a different style I thought I would follow the directions to the letter. Big mistake. If the dough feels too heavy always question the recipe I guess is my takeaway. It’s basic math issues like this that make me lose confidence in an author and their recipes. It’s really Important to try your own recipe as written to make sure it works before publishing it.
I just realized I made an error – I mistakenly assumed that my largest sheet pan was 18×26, but it is only 15×20, (the largest sheet pan that can fit in a home oven). It didn’t occur to me that this recipe was not for a typical home oven, my mistake. I still question the amount of dough even at that larger size, but since I have no way of testing that out, will assume the recipe works. The Roman pizzas I have had in the past were thinner than focaccia, but similar crumb. Either way, unless you have a huge oven you will need to adapt this recipe to the pans you have and that can fit in your oven. Apologies to the author.
Bonci says to scale the dough weight is square cm of pan (cm length X cm width) divided by two.
Can you confirm 2.4 oz salt? That seems like an awful lot. I’m about to make this and plan to use 1 tsp for half a recipe.
And thanks for your efforts, I’ve watched your video multiple times and am excited about this!
Hi Pam. Yes, the amount is correct, but please note that it is meant for 5 lbs of flour. With that amount, you can make about two 18″x26″ pizzas, which don’t fit in many domestic ovens. I would recommend checking your sheet pan size and dividing the ingredients’ amount by 3 for a 16″ X 22″ pan, or by 4 for a 13″ X 18″ pan.
Thank you for the article!
If I use a gas pizza oven (gozney) that will get much hotter than a normal oven, do you know the cooking times and to what’s temperature I should make it?
Thanks again for the detailed recipe!
Nick
The metric option on your recipe needs to be corrected.
2268 lbs high protein flour SHOULD read: 2268 GRAMS (unless you want a ton of flour)..actually 2270 is more accurate: 454g/lbs.
3.8 lbs of water (SHOULD read: 1700 GRAMS )
2.4 dry ounces of salt (SHOULD read: 68 GRAMS)
3 grams of yeast
89 ml of olive oil (SHOULD read: 89 GRAMS)
It would be helpfull if the bakers percentages were shown, see below.
Above is close to the following Bakers Percentage (%)
Flour: 100 %
Water: 76 %
Salt: 3%
Yeast: 1.3 %
Oil : 4 %
The amount of dough could be on the heavy side. I have not made this pizza yet. So I will find out eventually. Thanks for the video.
Hi Paul, and thanks for pointing it out. The metric conversion is done automatically by the plugin we use to create the recipe cards, but it has given us some problems for this recipe. I’ll edit it with the proper amounts in both imperial and metric units.
Hi Paul. You’re right, thanks for pointing it out. The conversion was made automatically by the plugin we’re using to create the recipe card, but it has been making some mistakes lately, so I’ve disabled the option.
Can you provide the timings if I want to add toppings – say tomato sauce and mozzarella making it into a Margherita? Do I cook for the full 12-15 minutes and then add the toppings? If so,, for how much longer should I cook the pizza without it becoming too dry and hard? If I should add the toppings before the full 12-15 minutes- at what time should I do this?
Thanks
We make the pizza bianca first. Then when that is baked we add our sauce and toppings. Our oven is usually set at 500 degrees F and it we put it in for another 8-10 minutes. Every oven is different so keep an eye on it. When the cheese looks brown and bubbly it’s usually ready.
If baking a smaller portion (1/4) of the recipe, what temp and for how long would you bake? Grazie!
Thank you for this! It would be helpful if you could add the baker’s percentage, as the recipe measurements are huge and also the metric conversion seems very broken.
Looking forward to trying this!
Email chuck@mortadellahead.com and I can give you the details. Thanks!
I would like to use a mixer instead.
How would that work? And which speed to select?
— Marco
Pour flour into mixer and distribute yeast evenly throughout. Pour in water in a steady, gradual stream. Mix on low for about 4 minutes. Add all salt last. Turn mixer to high for last 2 minutes.
Hi how many cups of water? I’ve never seen a recipe that called for 3.75 lbs look forward to hearing from you
thanks
hairybear2@aol.com Greg
It’s about 7 1/2 cups of water, but we like using weights to be more precise.
Hi
Firstly thank you.
After the first mixing you just put it into the fridge. I have noticed on Bonci videos that he does a few folds spread over 15 min wait times before putting to to rest.
Is it because you have such a long fermentation that you don’t need the folds?
Thanks
Does this dough have to be immediately placed in the oven after the 72 hours or can I keep it in the fridge till I’m ready to use it?
After about 96 hours the dough will become flat. Don’t go past 96 hours usually.
Hi there, cn I use this dough to form a Neapolitan/NY style of round pizza or would that not be suitable?
Many thanks,
Linda
I’m 48 hours in and am looking forward to trying this out tomorrow evening! The one criticism I have is the sheer volume of this… 5 pounds of flour??!!?? It would be nice if you used the measurements that you used in the video and pictures and that was no where near 5 pounds! Plus, could you keep your measurements to either standard OR metric and not a mix? I halved the recipe and will probably have enough dough for 4 large home baking sheets:)
Is 400 the right temp? That’s what the recipe says but in your comments you say 500. Thanks!
hi chuck, when you take out the dough after 48 hrs , are doing those folds while the dough is cold? have the dough made cant wait to try it
jim d, still waiting to hear about folds after 48 hrs. are you doing these folds while the dough is cold?
I made this according to the recipe (only I froze it as suggested after the 72h mark, since I wasn’t prepared to bake it right away; I thawed it overnight in fridge, then proceeded with rest of recipe). Shaping it was very difficult since the dough was so wet; it looked nothing like in your video, and I couldn’t create pockets of air the way yours looked. I went forward anyway with the rest of the recipe just as written, and it came out rather flat with a poor crumb, not crisp at all and seemed very undercooked generally and particularly in the center.
What did I do wrong? I still have the second batch of dough and would like to get it right.
I’ve been making homemade pizza for years best pizza crust I’ve ever had thank you
I just made the 1st part of the dough and isn’t soft where did i go wrong, or should I just wait until the 48 hours is up and do the kneading and continue with the rest of time..