Tired of that grocery store bread and craving that good homemade bread but are intimidated by it? This recipe combines everything from that homemade deliciousness to a quick prep – a game-changer for anyone who’s yearning for homemade bread but thinks it’s too much time commitment.
It’s all about bringing that freshly-baked, soul-satisfying experience into your kitchen with minimal fuss and maximum flavor.
Total prep time: 5-10 minutes
Rising time: 1-5 hours (longer is ok too)
Baking time: 1.5 hours
How to Make Bread
You may be as surprised as I was to discover how easy it is to make bread, and you might be even more surprised that the instructions are even easier!
Ingredients:
- 6 cups bread flour
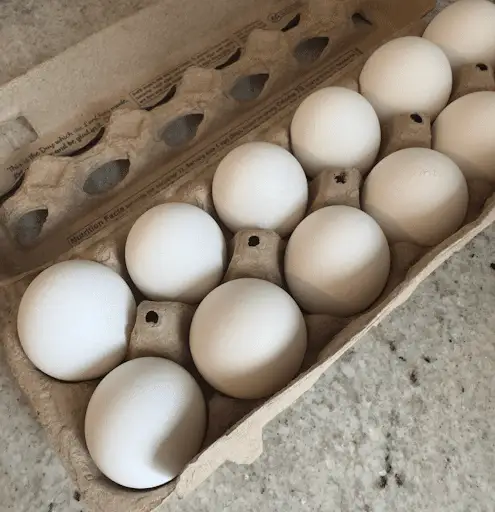
- 1 1/2 tablespoons active dry yeast
- 2 cups warm water (about 110°F / 45°C)
- 1.5 tsp salt
- 1/4 cup olive oil
- Optional: 1 tsp sugar (or 2 tsp honey)
Tip: Use self-rising flour if you want to bake it right away – only 5-10 minutes rising!
Alternative Ingredients:
- Water – Whole milk, non-dairy milk like almond or soy milk for a richer flavor and softer crumb
- Sugar – Honey, maple syrup, agave nectar
- Active dry yeast – Instant yeast (1 pack)
- Olive oil – Melted butter, avocado oil, vegetable oil
- Bread flour – All-purpose flour, whole wheat flour, gluten-free flour blend
Add-Ins:
- Flax seeds
- Sesame seeds
- Sunflower seeds
- Poppy seeds
- Nuts
- Dried fruits
- Herbs like rosemary or thyme
- Cheese
Step-by-step Instructions
You’ll be surprised to hear how easy it actually is to make your own bread, once you’ve tried these detailed instructions!
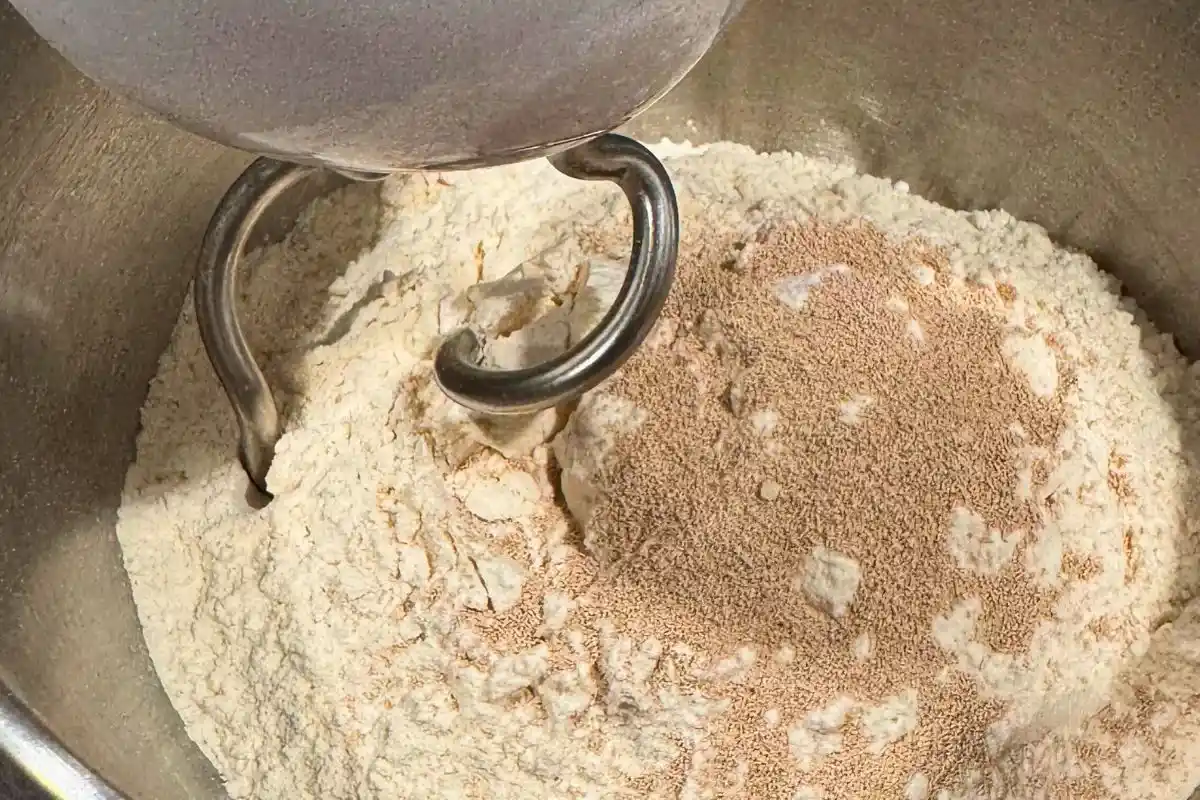
Step 1: Take a large mixing bowl and dissolve the sugar in warm water (if using), then stir in the yeast and allow it to sit for about 5 minutes or until the yeast mixture has turned frothy.
Step 2: Add the salt and olive oil to the mixture and start mixing in the flour one cup at a time – use a stand mixer with a dough hook, food processor, or by hand.
Tip: When you’re measuring the flour amount, fluff up the flour first before filing the cup. This will prevent you from overfilling it and using too much flour.
Step 3: Keep adding a little flour until the dough forms and begins to pull away from the sides of the bowl.
Note:
- Stand mixer, continue to knead on a low setting for a few minutes.
- By hand, turn the dough onto a floured surface and knead for about 5-6 minutes.
Step 4: Place the kneaded dough back into the bowl and cover it with a damp cloth, then let it rise in a warm place until doubled in size, so about 1-1.5 hours.
Step 5: Next, punch it down to release the air and turn it out onto a lightly floured surface.
Optional: Split the dough in half and form each half into a loaf by flattening it into a rectangle and firmly rolling it (optional if you want two loaves.
Step 6: Grease a loaf pan and place the shaped dough inside the pan, alternatively, you can also use a dutch oven – in either one, cover it with a damp cloth and allow the dough rise again for about 30-40 minutes.
Step 7: Preheat the oven to 425°F about halfway through the second time you let the dough rise in step 6.
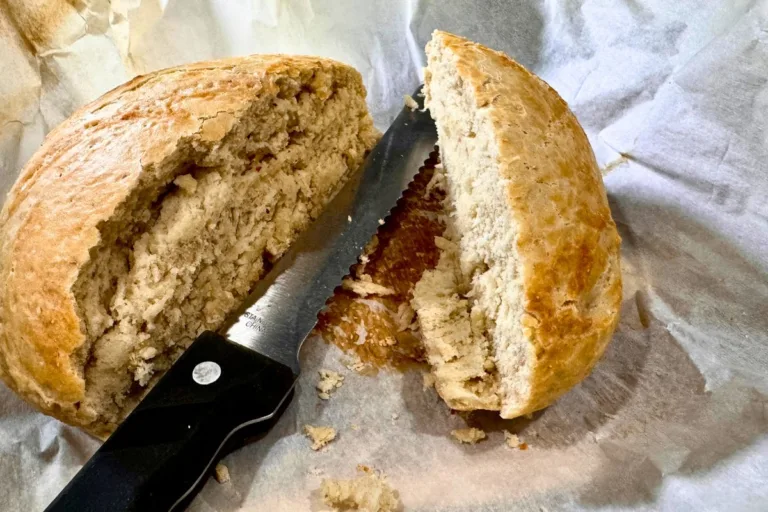
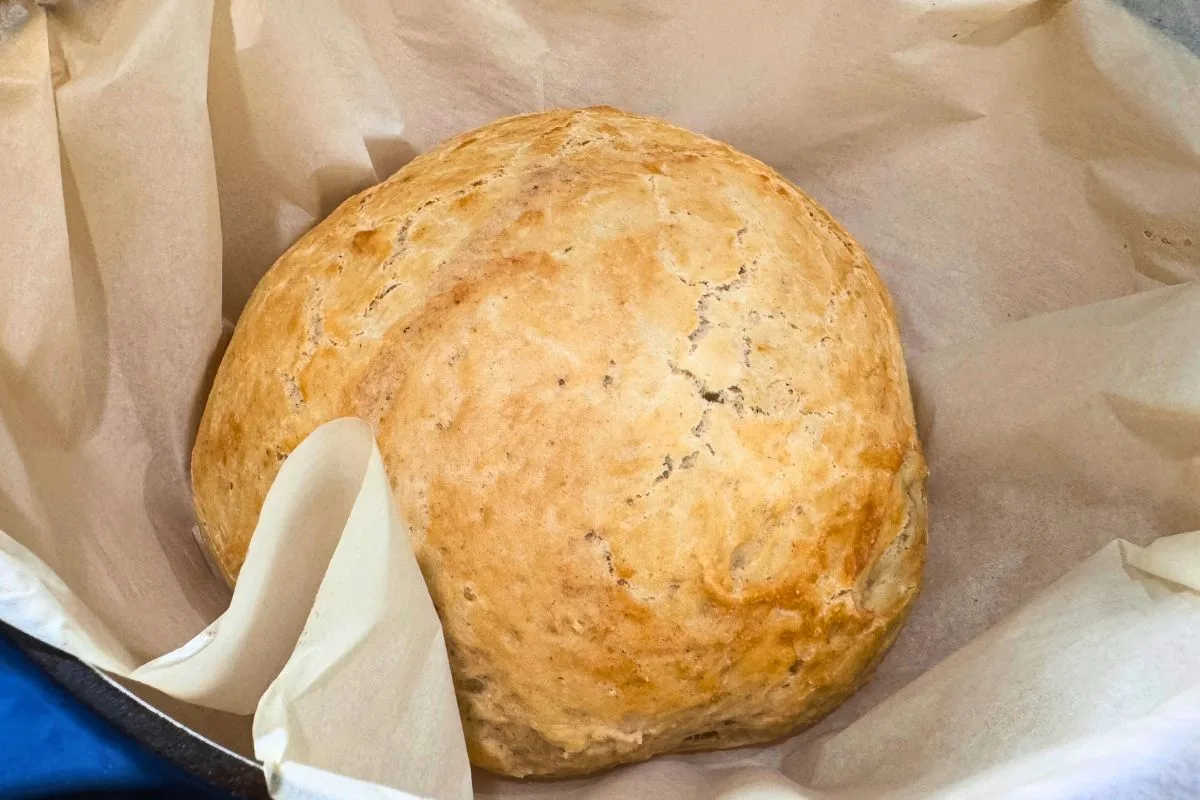
Step 8: Put the bread in the warm oven and bake it for approximately 40-60 minutes, or until the top is golden brown and a hollow sound is made when you hit the bottom.
Tip: If you’re using a dutch oven, keep it closed for 30 minutes, then let it bake for another 30-60 minutes until it’s golden brown.
Step 9: Once it’s golden brown, take it out of the oven and let it cool in the pan/dutch oven.
Step 10: Let it rest and completely cool off at room temperature.
Expert Tips
Here are some tips for best results:
- When proofing the yeast (activating it), don’t use hot water but rather warm because you could kill it and it won’t activate (aim for 110°F (45°C).
- If you’re using instant yeast, you don’t need to let it rise!
- Knead the dough until it’s smooth and elastic, which can take up to 10 minutes by hand – you know it’s ready when it springs back when poked.
- If the dough is too sticky, keep adding a little bit of flour to it until it becomes soft and airy – alternatively, add some olive oil to your hands when kneading for less of a mess!
- Yeast loves a warm environment, so to help your dough rise you can place it in a slightly warm oven (turned off) with the light on or near a warm window – but not in direct sunlight.
- To get a crispy crust, place a pan of water on the bottom of the rack in the oven while you’re baking it – the steam will create that crispy crust.
- Not sure if the bread is ready? Tap on the bottom of the loaf, if it sounds hollow, it’s done! Alternatively, you can also put a thermometer into the center, which should read around 190-200°F (88-93°C).
- Once cooled off, store the bread in a bread box or paper bag – NOT in a plastic bag or box as it can make the crust soggy. For longer storage, slice and freeze it.
Alternative Homemade Bread Recipes
The versatility of this bread recipe will amaze you – so much, it’ll quickly become your go-to dough recipe as you can prepare it in different ways to make your favorite dishes.
Garlic Bread Recipe
For this recipe, we will use the exact same ingredients as for the bread loaf:
1 loaf of homemade bread (from the recipe provided)
Additionally, you will need:
- 1/2 cup (1 stick) unsalted butter, softened
- 4 cloves garlic, minced
- 2 tablespoons fresh parsley, finely chopped
- 1/2 teaspoon salt
- Optional: 1/4 cup grated Parmesan cheese
- Optional: 1/2 teaspoon dried oregano or Italian seasoning
- Optional: Pinch of red pepper flakes
Feel free to adjust the ingredients based on your liking!
How to Make Homemade Garlic Bread
- Preheat your oven to 400°F (200°C).
- In a small bowl, combine the softened butter, minced garlic, chopped parsley, salt, and if you’re using them, the Parmesan cheese, oregano, and red pepper flakes – mix it all well until combined.
- Meanwhile, slice the bread you baked in half horizontally.
Tip: If you’re using a full loaf, you can also make 1-inch thick slices without cutting all the way through, creating a pull-apart effect – this will wow loved ones! - Spread the garlic butter mixture evenly over the cut sides of the bread.
Tip: If you’ve sliced the bread, make sure some of the mixture gets between the slices.
- Place the bread halves on a baking sheet with the cut side up. Then bake it in the preheated oven for about 10-12 minutes, or until the edges are golden brown and the butter is bubbly – yum!
Tip: For a crunchier top, switch your oven to broil and broil the garlic bread for an additional 1-2 minutes – but keep a close watch to prevent burning.
Lastly, take the garlic bread from the oven and let it cool for a minute at room temperature before you slice it – enjoy!
Pizza Bread Rolls Recipe
I loooooove pizza bread rolls – if they’re not your favorite yet, they will be once you’ve tried these!
Ingredients:
- 1 batch of homemade bread dough (from the provided recipe, prepared up to the pre-baking stage)
- 1 cup marinara sauce, plus more for serving
- 2 cups shredded mozzarella cheese
- 1 tablespoon Italian seasoning
- 1 teaspoon garlic powder
- Olive oil, for brushing
- Grated Parmesan cheese, for sprinkling
- Any preferred toppings such as sautéed vegetables, cooked sausage, etc.)

How to Make Pizza Bread Rolls
- Preheat your oven to 375°F (190°C) and line a baking sheet with parchment paper or lightly grease it.
- Once the dough has risen once and you’ve punched it down to let the air out – take a little bit of flour and put it on a clean surface and place that dough there.
- Cut the dough into equal-sized pieces (this recipe would yield 12-16 pieces depending on the size).
- Roll each dough piece into a small rectangle and spread a tablespoon of marinara sauce on it – make sure to leave the border clean though or it’ll get messy.
- Sprinkle the mozzarella cheese and any other toppings as well as your desired seasoning on it.
- Now you need to fold them! Take the long edges for your rectangle and put them together in the middle before pinching them – the filling should be enclosed now.
- Put the rolls aside and let them rest and rise again for about 10-15 minutes so they become more puffy.
- Brush the top of the rolls with a little olive oil and sprinkle some grated Parmesan cheese on top.
- Bake the rolls in the preheated oven for about 15-20 minutes or until they’re golden brown and the cheese is bubbly.
Enjoy warm with some extra marinara sauce for dipping!
Frequently Asked Questions (FAQs)
Making your first loaf of bread can be intimidating, but it’s much easier than you think! Nonetheless, when I made my first one, I had sooooo many questions!
Can I use all-purpose flour instead of bread flour?
Yes! You can use either all-purpose flour or bread flour, the biggest difference is that bread flour has a higher protein content, which helps with the gluten development and it gives the bread a chewier bread texture.
Do I need to use sugar in the bread recipe?
You don’t need to use sugar! However, it helps the yeast to rise the bread – plus it gives it a sweetness. If you’re not a sugar fan, you can try using honey.
How can I tell if my yeast is active?
Great question! The biggest indication is that the yeast mix will start to froth and bubble within 5-10 minutes – if it doesn’t, your yeast may be too old or inactive and your bread won’t raise properly.
My dough didn’t double in size during the first rise. What went wrong?
Great question! There are various factors what may have caused the bread not to rise properly, including:
- Room was too cold
- Yeast is too old
- Dough might not have kneaded well enough
Try putting the dough into a warmer place and check the expiration of your yeast.
Can I make this bread recipe in a bread machine?
Yes! To make things easier, use your bread machine, for this simply add all ingredients to the bread machine according to the manufacturer’s instructions – usually, start with the liquid ingredients, then the dry ingredients, and yeast as last.
How do I store homemade bread to keep it fresh?
Your homemade bread will last the longest and freshest if you keep it at room temperature and in a bread box or wrapped in a paper bag for a few days – if you want to store it longer, slice it up and put it in the freezer.
DON’T use plastic bags because they may make your crust soft.
Print
10 Minute Bread Recipe | Homemade & Fast!
Ingredients
Ingredients:
- 6 cups bread flour
- 1 1/2 tablespoons active dry yeast
- 2 cups warm water (about 110°F / 45°C)
- 1.5 tsp salt
- 1/4 cup olive oil
- Optional: 1 tsp sugar (or 2 tsp honey)
Tip: Use self-rising flour if you want to bake it right away – only 5-10 minutes rising!
Alternative Ingredients:
- Water – Whole milk, non-dairy milk like almond or soy milk for a richer flavor and softer crumb
- Sugar – Honey, maple syrup, agave nectar
- Active dry yeast – Instant yeast (1 pack)
- Olive oil – Melted butter, avocado oil, vegetable oil
- Bread flour – All-purpose flour, whole wheat flour, gluten-free flour blend
Add-Ins:
- Flax seeds
- Sesame seeds
- Sunflower seeds
- Poppy seeds
- Nuts
- Dried fruits
- Herbs like rosemary or thyme
- Cheese
Instructions
- Take a large mixing bowl and dissolve the sugar in warm water (if using), then stir in the yeast and allow it to sit for about 5 minutes or until the yeast mixture has turned frothy.
- Add the salt and olive oil to the mixture and start mixing in the flour one cup at a time – use a stand mixer with a dough hook, food processor, or by hand.
Tip: When you’re measuring the flour amount, fluff up the flour first before filing the cup. This will prevent you from overfilling it and using too much flour.
- Keep adding a little flour until the dough forms and begins to pull away from the sides of the bowl.
Note:- Stand mixer, continue to knead on a low setting for a few minutes.
- By hand, turn the dough onto a floured surface and knead for about 5-6 minutes.
- Place the kneaded dough back into the bowl and cover it with a damp cloth, then let it rise in a warm place until doubled in size, so about 1-1.5 hours.
- Next, punch it down to release the air and turn it out onto a lightly floured surface.
- Grease a loaf pan and place the shaped dough inside the pan, alternatively, you can also use a dutch oven – in either one, cover it with a damp cloth and allow the dough rise again for about 30-40 minutes.
- Preheat the oven to 425°F about halfway through the second time you let the dough rise in step 6.
- Put the bread in the warm oven and bake it for approximately 40-60 minutes, or until the top is golden brown and a hollow sound is made when you hit the bottom.
Tip: If you’re using a dutch oven, keep it closed for 30 minutes, then let it bake for another 30-60 minutes until it’s golden brown. - Once it’s golden brown, take it out of the oven and let it cool in the pan/dutch oven.
Enjoy and share with loved ones!