The Italian herb and cheese roll is many people’s favorite Subway bread option. In this post, I’ll show you how I tried to replicate it at home.
Here in Italy we don’t have Subway. The only store was in Rome and it closed three years ago.
However, their subs are not difficult to make at home. In fact, with about 5 euros and a little patience, I could make 3 or 4 delicious cheese and herb bread rolls using local, quality ingredients. But before we make our own version, let me share to you why it’s been a fan favorite.F
Why Subway’s Italian Herb and Cheese Bread is a Fan-Favorite
Subway’s Italian Herb and Cheese bread is one of the most popular choices among patrons, and it’s easy to see why. This bread variant isn’t your standard sandwich carrier, it’s a flavorful component that plays an integral part in the overall taste experience.
What sets this bread apart is its exceptional blend of select seasonings and cheese, baked right into the bread, offering an additional layer of flavor to any sandwich. The unique taste profile combines a subtle base of Italian spices.The texture of the bread also plays a significant role in its popularity. It masterfully strikes a balance between a crispy crust, owing to the baked cheese, and a soft, tender interior.
The texture of the bread also plays a significant role in its popularity. It masterfully strikes a balance between a crispy crust, owing to the baked cheese, and a soft, tender interior. Beyond taste and texture, the Italian Herb and Cheese bread adds an appealing visual element to the sandwich with its golden-brown crust, speckled with herbs and spotted with toasted cheese. The bread has a certain rustic charm that makes the sandwich look as good as it tastes.
So now, here’s what you need to do if you want to do the same.
What you’ll need
The recipe for this sub roll is not different from any other bread recipe. You’ll just need to add some ingredients on the top before baking.
Flour: I used a bread flour that they sell at my favorite bakery, but all purpose flour will do as well.
Warm water: many online posts recommend a temperature of 105 to 110° F. But honestly, that seems too excessive. Sure, using warm water can speed up the rising process, but too much temperature will make the dough less digestible. Better to wait a little longer and enjoy a good quality bread, right?
I usually use water at around 72° F. However, Gianna’s father (who’s a baker) suggested keeping it between 78° F and 82° F for this recipe.
Active dry yeast: or fresh yeast, if you prefer. I’ll put the exact amount for each in the recipe card at the end of the post. If you want to know more, here’s a good article about the different types of yeast and their use.
Sugar: A small amount of sugar helps the yeast to activate and ferment better during the second rising phase.
Herb mix: you can go for a simple mix of oregano and thyme, or make an Italian seasoning. Use your favorite flavorful herbs. You can also add a sprinkle of ground black pepper.
Garlic powder: I often recommend using fresh garlic for your recipes. However, for this one, you can use garlic or onion powder.
Grated parmesan and shredded Monterey Jack cheese: this should be the standard Subway mix. However, you can try out other combinations. Parmesan and pecorino together might be a good alternative.

Optional ingredients
You can add a little butter or olive oil to the dough to make it more elastic and result in a softer bread.
Other people like to add vital wheat gluten to give more structure and stability to the dough. This is easpecially helpful for bread recipes with whole wheat flour. If you like to use it, the recommended ratio is 1 tablespoon per 2 cups of flour.
Speaking of which…
What’s the right flour/water ratio
When making fresh bread or pizza dough, everyone has their own recipe. I like to stick with this scheme:
- Water: 75% of the amount of flour used;
- Salt: 30 g/Kg;
- Active dry yeast: 8 g/Kg.
So, for 500 grams of flour, I used 325 ml water, 4 grams of yeast, and 15 grams of salt. If you prefer to measure them in cups and tbsp, go check the recipe card at the end of the post.
Let’s make a Subway Italian Herb & Cheese Bread Roll
Step 1: Put the water in a small bowl, check that it is the right temperature, and then dissolve the yeast and sugar in it. Leave them there for at least 10 minutes.
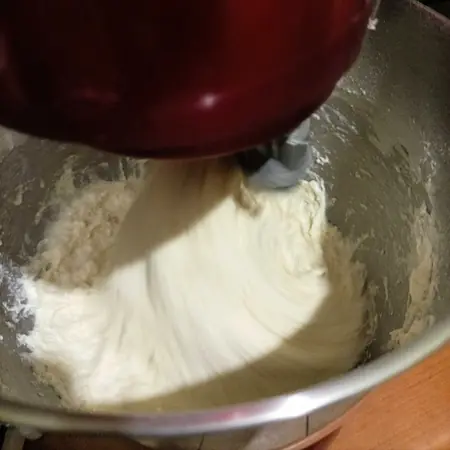
Step 2: Put the flour in the stand mixer, operate the dough hook on slow speed, and add the water and yeast mixture a little at a time. After about a minute, raise the speed slightly to medium-low and let the machine knead for at least another 9 minutes. Halfway through the process, add the salt.

Step 3: Transfer the resulting dough ball to a lightly floured surface. Fold it over itself a couple of times, then place it in a bowl and cover it with plastic wrap, or a kitchen towel. Let it rise for about 2 hours.
Step 4: Put a little extra flour on the work surface, and return the dough ball there. Now it is time to knead it to give it more strength.
I use a two-fold system. I take one end, and fold it to the center of the ball. Then I take the other end, and fold it over the other one. Finally, I turn the dough ball over and repeat.
Step 5: Divide the ball into 3 or 4 equal pieces of dough, and arrange them on top of a baking sheet previously covered with greaseproof paper. Give them the shape you would like your bread rolls to have.
Now, cover them with a kitchen cloth and let them rise in the unlit oven or in a warm place for another two hours.
When you take them out, start preheating the oven to 430° F, static mode.
Step 6: It’s time to turn your homemade bread into a Subway Italian herb and cheese bread. Add the herbs, the garlic powder, and the cheeses on top of each loaf. Pat them gently to better incorporate them into the dough.

Step 7: Bake in static mode at 430 degrees F for about 20-25 minutes. Each oven may require slightly different baking times, but the important thing is not to open it for at least 15 minutes.
Pro tip: Place the baking sheet in the medium-high part of the oven and place an oven-compatible pan full of water under it. The steam will ensure that the surface of the bread does not dry out too quickly. This way, you will get a crispy but not too thick crust and a soft interior.
Last step: Remove your cheese & herb Italian bread rolls from the oven, let them cool, and enjoy them with your favorite sandwich fillings. .

Storage and Freshness Tips for Homemade Italian Herb and Cheese Bread
Proper storage is key to maintaining the quality and extending the life of your homemade bread. While fresh homemade bread typically doesn’t last as long as commercially made bread due to the lack of preservatives, you can still enjoy your bread for a good amount of time with these tips:
Cool Completely: Before storing your bread, it’s essential to let it cool completely. If you store warm bread, it can result in condensation within your storage bag or container, which could potentially lead to mold.
Airtight Containers: For short term storage, an airtight container or a plastic storage bag can help retain the bread’s moisture and prevent it from drying out. If you’re concerned about the cheese on top, consider wrapping the bread loosely in a layer of parchment or wax paper before placing it in the bag or container.
Room Temperature Storage: Bread is best stored at room temperature. Avoid storing it in the refrigerator, as this can actually cause it to go stale faster due to the process known as retrogradation.
Freezing for Longer Storage: If you’ve baked more bread than you can consume in a few days, freezing is an excellent option. Slice the bread first so you can easily grab just what you need. Wrap it tightly in plastic wrap, then in aluminum foil to prevent freezer burn and keep it fresh. It can last in the freezer for up to three months.
Revive Day-Old Bread: If your bread has become a little stale but you’re not ready to part with it just yet, try reviving it by sprinkling the crust with a little water and heating it in a warm oven (around 300°F or 150°C) for about 5-10 minutes. The heat will help the water to steam the bread, making it soft and fresh again.
Substitution Suggestions for Italian Herb and Cheese Bread
Flour: If you’re making gluten-free bread, use a gluten-free flour blend. Be sure to look for one that substitutes well for all-purpose flour on a 1:1 basis. Adding xanthan gum may also be necessary if your blend doesn’t include it.
Yeast: If you only have instant yeast on hand, you can use it instead of active dry yeast. The rule of thumb is to use 25% less instant yeast than active dry yeast.
Sugar: While sugar helps the yeast to activate and contributes to the bread’s texture and flavor, you could substitute honey or agave nectar if you prefer a more natural sweetener.
Dairy-Free: For those with a dairy intolerance, swap out the cheeses with dairy-free cheese alternatives that melt well. For the best results, opt for ones that have a similar flavor to mozzarella and cheddar.
Herbs: If you don’t have all the individual herbs for the Italian seasoning, you could use a pre-mixed Italian seasoning blend. Alternatively, you can simply use the herbs you have on hand. Italian cuisine typically features herbs like oregano, rosemary, and basil, but thyme, marjoram, or even a bit of sage could also work.
For a Healthier Twist: Consider using whole wheat flour for half of the all-purpose flour to increase the fiber content of your bread. Be aware that this may result in a denser loaf, but the robust flavor could be a delicious change.
Salt: For those on a low-sodium diet, you can reduce the salt. However, keep in mind that salt does contribute to the flavor and texture of the bread.
Subway Bread Recipe FAQs
Q: What are the best fillings?
A: This type of bread is perfect for any recipe that has meat and sauce. You can fill it with teriyaki chicken, steak and cheese, and so on.
I had to finish some leftovers, so I improvised a sandwich with cut beef and my creamy cabbage pesto. It was very good, but would have been even better with some mozzarella cheese.

Here are some of our recipes that I think would be perfect with herb and cheese bread:
Q: Can I use instant yeast?
A: I think this recipe works best with active dry yeast. However, you can check the article I linked in the paragraph about ingredients to see how to switch between different types of yeast and make your own experiments.
Q: Can I reduce the rising time?
A: You can reduce the first rising phase to 1 hour, and the second one to 40 minutes, but the result will probably be less digestible. I prefer to wait. After all, you don’t need to be around the dough while it rises. The time you’ll spend actively working on this recipe is about 30 minutes.
Sure, maybe it’s not a recipe fit for working days, but if you’re cooking for a party or on a free day you can easily fit it into your schedule. I’m going to make it along with cappelletti in brodo and parmesan truffle fries for the next Sunday lunch with my family.
Q: How do I achieve the perfect “sub” shape for my bread?
A: After your dough has risen, divide it into equal portions, and roll each portion into a long, thin log. Let these logs rise until they’ve nearly doubled in size before baking.
Q: How do I store leftover Subway bread?
A: It’s best to store leftover Subway bread in an airtight bag or container at room temperature. It should last for about 2-3 days. You can also freeze it for longer storage.

Subway Inspired Italian Herb And Cheese Bread
5 Stars 4 Stars 3 Stars 2 Stars 1 Star
No reviews
- Author: Mortadella Head
- Total Time: 290
- Yield: 3 - 4 bread rolls 1x
Ingredients
4 + 1/6 cups bread flour (500 g)
11 fl oz water (325 ml)
2 + 1/2 tsp salt (15 g)
1 + 1/3 tsp active dry yeast
1/2 tsp sugar
2 tbsp garlic powder
2 tbsp Italian seasoning
1 tbsp grated parmesan
1 tbsp shredded Monterey Jack cheese
Instructions
- Put water in a small ball and add the sugar and active dry yeast. Let them dissolve for 10 minutes.
- Add flour to the stand mixer bowl. Activate the dough hook at slow speed and gradually add the water. Then, turn the speed to medium-low and let the machine work for another 9 minutes. Halfway through the process, add the salt.
- Place dough on a floured working surface and fold it a few times with your hands. Then put it in a bowl, cover it with plastic wrap or a kitchen towel, and let it rise for 2 hours.
- Put the dough back onto the working surface and fold it again to give it strenght. Then divide it in 3 or 4 loaves.
- Place loaves on a baking sheet lined with greaseproof paper, cover them with a kitchen towel, and let them rise for another 2 hours in a warm place.
- Top the loaves with the herbs, garlic powder, and the cheese mixture. Pat them gently to let the dough incorporate the other ingredients a bit.
- Bake at 450° F in static mode for 20 minutes. Then check to see the state of the crust and, if necessary, keep baking for another 5 minutes.
- Take the bread rolls out of the oven and let them cool for a few minutes.
- Enjoy them with your favorite filling.
Notes
For best results, place an oven-compatible pan full with water on the lower half of the oven. The steam of the water will prevent the bread crust from drying up too soon.
- Prep Time: 30
- Rising time: 240
- Cook Time: 20
- Category: Bread
- Method: Baked
- Cuisine: Italian


